Demolition is kind of thrilling, but you can’t just keep destroying things forever. After lowering the dirt level enough beside the concrete pad and removing the bottom bits of rotten fence, it was time to assemble the new chicken coop. It wasn’t really just a two-person job, but somehow, The Husband and I got all the pieces up and joined together. The roof was quite heavy. Somehow the floor that I had asked for in my original request didn’t end up getting included. I think it got lost in all my other adjustments: no external wooden nestboxes, just a flat front, ply on the bottom half of the door instead of netting for better weather protection and darkness, one long roost instead of two short width-wise ones…
We got a sheet of thick ply for the floor and then tried to decide how to sit it. I wanted to sit it on square-sided length of timber to raise it up a bit off the ground. The Husband said not to bother. So I didn’t buy any. When assembly time came The Husband asked where the pieces of timber were. I said I thought we didn’t need any. He said of course we needed something or the floor would rot. Dargh! What a great decision-making process. And so, the floor is now sitting on bricks. We can switch them out for timber in the future if we need to. The floor is a bit wider than the coop footprint but we’ve just left it like that for now.

Next, it was time for painting. This is the first time I’ve actually painted something of a large size for our own place, so I’ve found it quite exciting. Choosing paint colours is something akin to choosing a chocolate from a box of chocolates. I didn’t test colours, I jumped straight in with a final decision for the wall colour. It is just a chicken coop, after all. I tried not be swayed by the colour names. If there was a colour called Twiglet that would have been helpful. Mind you, a colour called Twiglet would no doubt turn out to be some kind of brown, probably a pooh brown. That would be terribly disappointing, so perhaps it is best if the paint people try to avoid making a colour called Twiglet. My chosen colour is a cream, rather similar to the colour of our house bricks. It’s a bit lighter than I had anticipated, but I’m still happy with it. Then I decided the roof must be a different colour. And the door frame. The paint is really just to prolong the life of the coop and help stop mites from burrowing in it, but it might as well look good. Being wary of having too much red in a potential mite environment, I am painting the roof and door frame in a burgundy colour, not too dark. No surprises there, right?


Eager to motor on while the weather was playing nice, I finished painting the walls at 9:30pm one night. That wasn’t planned, I was just going to do the third wall, but once I got going, by the light of my mobile phone, I couldn’t help but want to finish the final wall. I can’t recommend night painting, but it actually turned out alright. Once I had painted the door frame, and thus, everything but the roof, I decided the chickens were going to move in that evening. This may have had something to do with the fact that the small coop was due for it’s every-three-days cleaning. That’s what happens when you have too many chickens in a small coop. I sprayed all the joins, cracks and roost with Miss Muffet’s Revenge for a strong foundation of mite warfare. Hereafter, I will stick to the oil-water-dish liquid method as long as it works. Once I’ve painted the roof, I’ll spray around the edges of it again.

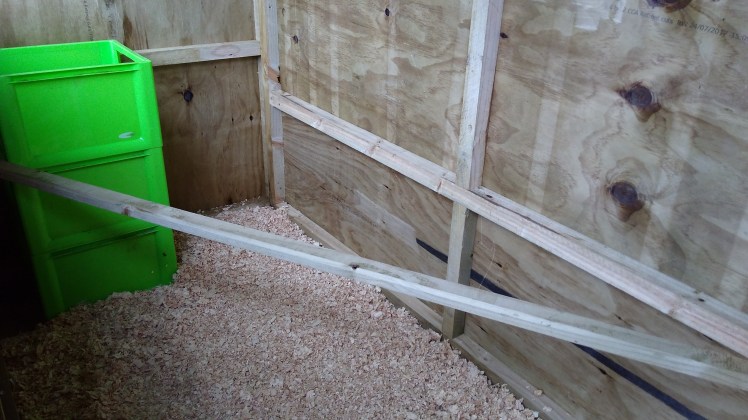
The long roost can sit on horizontal beams at each end of the coop, but that’s too high for my heavy chickens, so I’ll be making little wooden roost holders to attach to each wall as I did for the small coop. I can attach them at a level I’m happy with, enabling me to pull out the roost out for easy cleaning; an essential on the mite battlefield. For now, the roost is somewhat awkwardly positioned at an angle, resting on some slightly lower beams. After I get the roost sorted I can properly site the nestboxes and any ramps/platforms needed. It is a relief to get the chickens situated in there before the young girls start laying.
As of today, All of the outside of the coop has had one coat of paint. I just need to do a second coat of burgundy on the roof. I drew the position of the pop hole for the chickens to enter and exit the coop on the side opposite the garage door and The Husband cut it out for me. I still need to hinge the door on for opening and closing options. The feeder and water bell have been moved to sit beside that wall too.

Mr Darcy had the privilege of escorting the hens into their new home. I am pleased to announce that he is now the sole, chosen rooster, free to enjoy life without the threat of being attacked by Colonel Fitzwilliam. We’re having roast chicken for dinner tomorrow.

The Demo Project isn’t over yet, there’s still much more to be done. But having the new chicken coop up is just marvelous.

Is Colonel Fitzwilliam invited to diner tomorrow?
LikeLiked by 1 person
Most certainly. I expect he’ll be dressed nicely for the occasion too.
LikeLiked by 1 person
Splendid!
LikeLiked by 1 person