There is something I’ve been wanting to do. Sure, it sounded a little scary and intense, but it would be very rewarding in the end. I was determined to venture into the world of preserves. I wanted to make jams, chutneys, relishes, tomato preserves and more. This was the year. And this was the weekend.
I picked this weekend because it was the first weekend in ages that it wasn’t supposed to be stinkin’ hot and there was actually rain on the way. Rain? What’s that? I have gotten great joy out of the rain this weekend, even if it has only been light showers off and on. I can’t remember the last time rain made me so happy. And let’s not forget the marvellous clouds, which block the beating, scorching sun. Sorry, sun; I love you but we need a break.
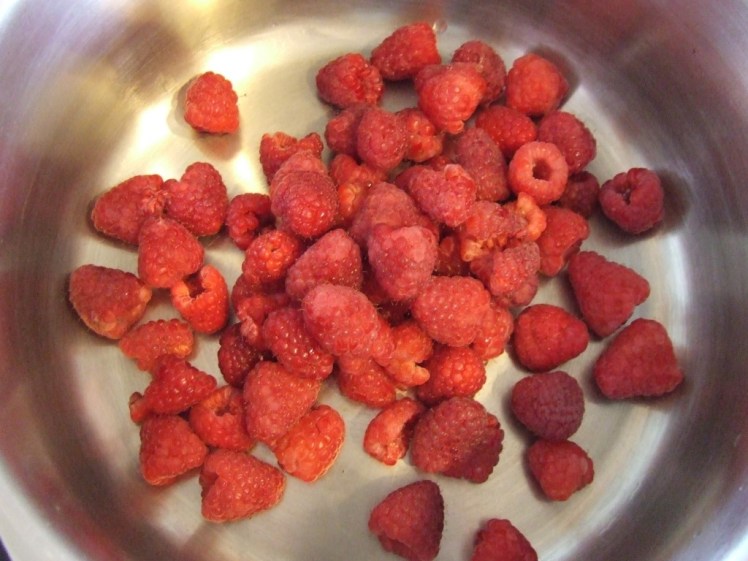
Now, I bought some raspberries and strawberries (to supplement my own) on Friday after work, all ready for The Jam Experiments. When it came to the recipe part, it would have made good sense to pick one and follow it for my first time. But I didn’t. This was because I wanted to make my jam with glucose instead of sugar. Oh, always so difficult and independent. I stopped buying jam from the supermarket in the name of sugar and processed food reduction. The main recipe book that I used for my jam inspiration was Ladies, a Plate: Jams & Preserves, by Alexa Johnston. I like it because it’s written by an NZ author and it has a lot of tasty-looking recipes and helpful comments. But it didn’t have anything about glucose. So, I trawled the interwebs, reading various comments and experiments about glucose in jam. Then I just took a stab at it myself. The following recipes aren’t necessarily professional, they are raw Twiglet recipes, which have yet to stand the test of time.

RASPBERRY JAM
This was my first jam experiment and quite a simple one to catapult myself into the world of preserves. It fits in a 500ml jar, with room to spare. A 400ml jar would be ideal.
Ingredients
- 3 cups (~375g) raspberries
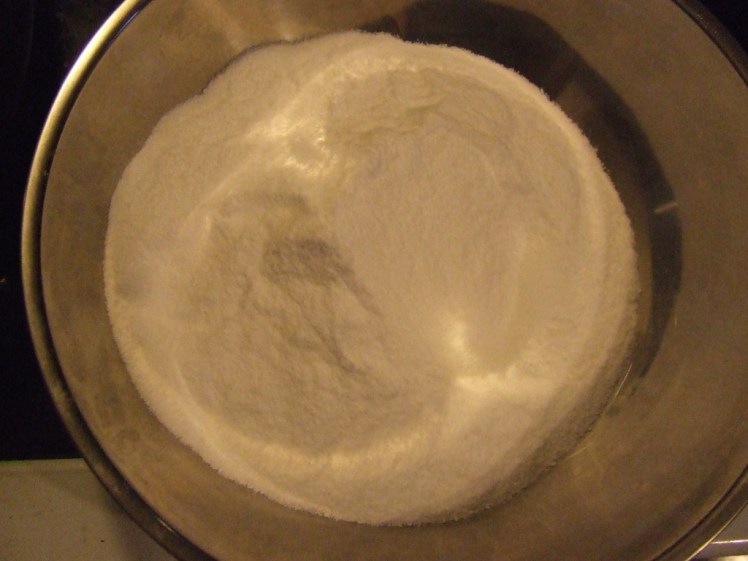
- 2 1/4 cups glucose (dextrose)
Method
- Sterilise jars and lids (after washing them) by sitting them on a baking tray in the oven. Turn oven to 120degC and leave jars in there for 30 minutes.
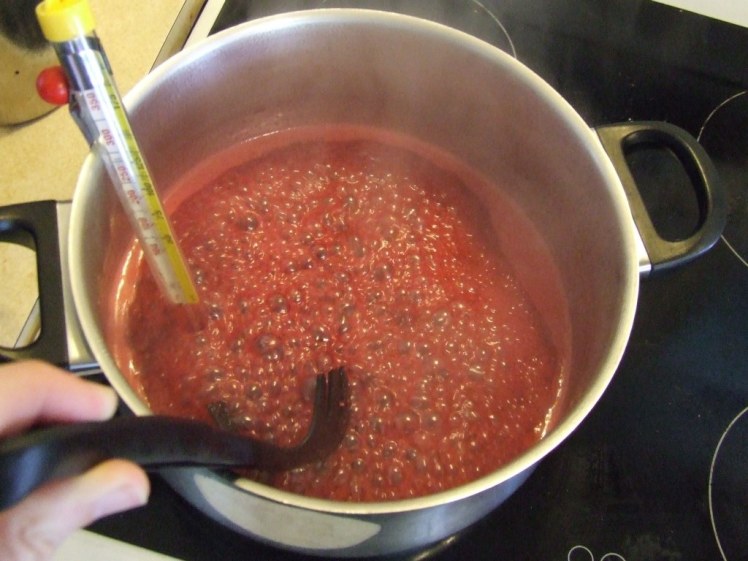
- Put raspberries in a wide-bottomed pot on the stove and heat on high, mashing with a potato masher (or substitute culinary implement) until berries are mushy.
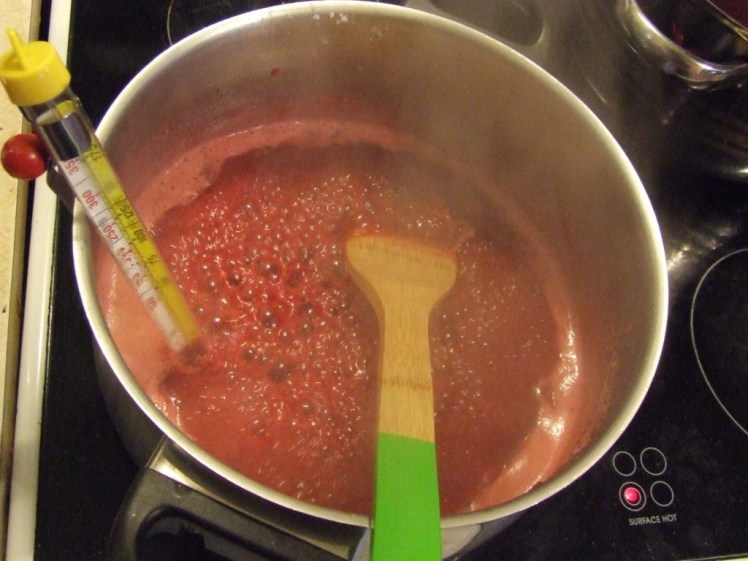
- Add glucose, continuing to heat on high, while stirring constantly, until jam gets to the thick, settable stage. This could be about 10 minutes, but it depends on the size of your pot, your ingredients, your stove, etc. The easy way is if you have a sugar/confectionery thermometer: cook until it reaches 110degC.
- Take the sterilised jars and lids out of the oven and pour/spoon/ladle the jam into the jars while it’s still hot. If using utensils, make sure these are sterilised too. Seal and allow to cool on a heat-proof surface.


RASPBERRY & STRAWBERRY JAM
This was going to be just strawberry jam, but I had a wee incident with mouldy, perishing strawberries. The strawberry component was thus made up of a few salvaged strawberries, fresh garden strawberries and some frozen garden strawberries. This jam has turned out a little more liquidy, perhaps because of the frozen strawberries. It fits in a 500ml jar.
Ingredients
- 450g raspberries
- 200g strawberries
- 250g glucose (dextrose)
- squirt of lime juice
Method
- Sterilise jars and lids (after washing them) by sitting them on a baking tray in the oven. Turn oven to 120degC and leave jars in there for 30 minutes.
- Put raspberries and strawberries in a wide-bottomed pot on the stove and heat on high, mashing with a potato masher (or substitute culinary implement) until berries are mushy.
- Add glucose and lime juice, continuing to heat on high, while stirring constantly, until jam gets to the thick, settable stage. This could be about 10 minutes, but it depends on the size of your pot, your ingredients, your stove, etc. The easy way is if you have a sugar/confectionery thermometer: cook until it reaches 110degC.
- Take the sterilised jars and lids out of the oven and pour/spoon/ladle the jam into the jars while it’s still hot. If using utensils, make sure these are sterilised too. Seal and allow to cool on a heat-proof surface.

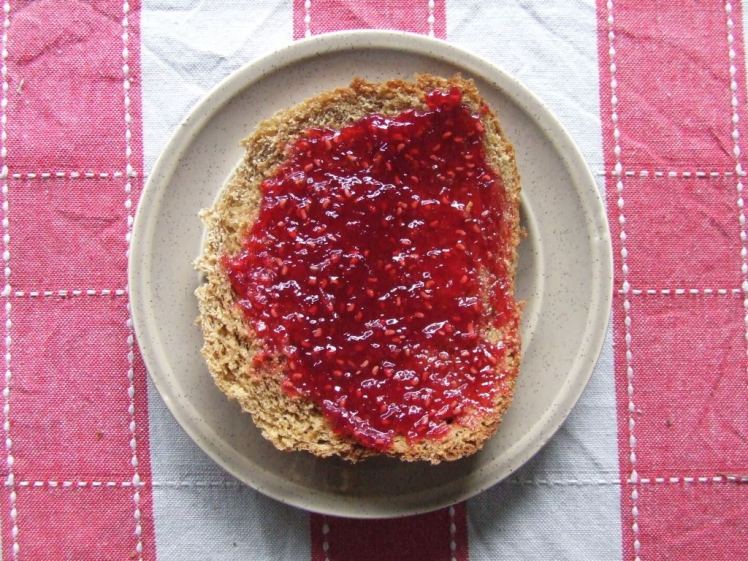
There are a few things I have learnt through The Jam Experiments. Firstly, we need a potato masher. I always forget we don’t have one until I need one. We don’t really eat mashed potatoes, that’s why. Must get one. Secondly, don’t leave berries out on the bench during summer unless you’re going to use them straight away. They go bad. And that’s very sad. I’m keeping my opened jam jar in the fridge at this time of year too. Thirdly, it is hard to take photos while constantly stirring. Fourthly, making jam is actually pretty quick and easy once you understand what you’re doing. Fifthly, which I perhaps should have mentioned first, this jam is tasty.
Although I have a long way to go and many more experiments to come, I feel I can now call myself a jamstress. Actually, I don’t know if I like that title. A preservist? What do you call us people? I think I’ll just say “I preserve stuff”. Next, I’ll have to do something about my captive audience of tomatoes…

Looks delicious =)
LikeLike